Image credit: North American Rockwell
File source: NASA NTRS
Image credit: North American Rockwell
File source: NASA NTRS
Image credit: McDonnell Douglas
File source: NASA NTRS

Image credit: McDonnell Douglas
File source: NASA NTRS

Image credit: McDonnell Douglas
File source: NASA NTRS
Image credit: Lockheed
File source: NASA NTRS

Image credit: North American Rockwell
File source: NASA NTRS
Image credit: North American Rockwell
File source: NASA NTRS
Image credit: North American Rockwell
File source: NASA NTRS
Image credit: North American Rockwell
File source: NASA NTRS
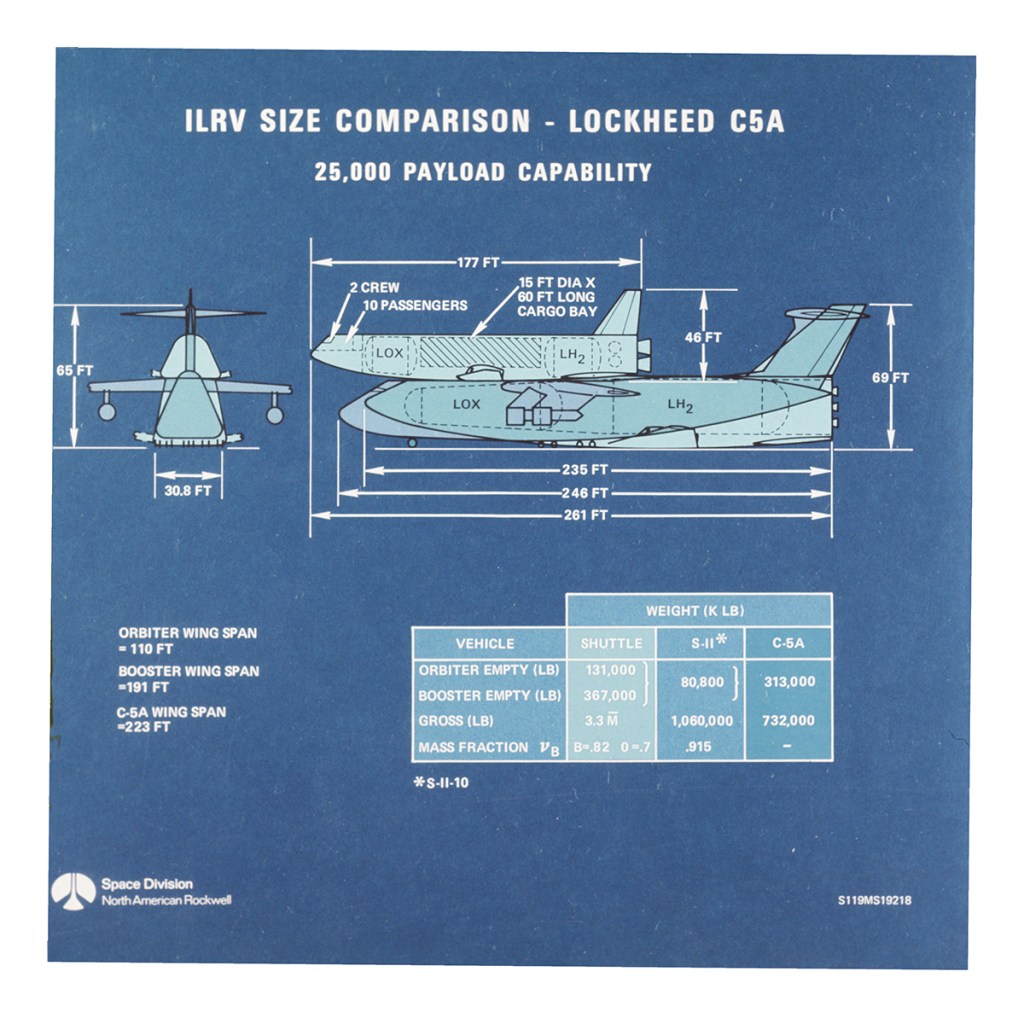
Image credit: NASA
Image source: Numbers Station